
Unit 18: Look and Feel Schemes

2
Questions Covered
• What is a Look and Feel scheme?
• What options are available in the Look and Feel wizard to customize the
appearance of Agiloft?
• How can I apply different look and feel schemes to different sets of users?

3
Before we Begin…
• This unit uses a set of practice files during the hands-on portion of
the exercises.
• In ProProfs, navigate to the Icon Set page.
• Download and save the Icon Set Zip File and Sample Logo to your
desktop.

4
Look and Feel Options
• Look and Feel options are accessed by navigating to Setup > Look & Feel.
• From here you can change the display of Required Fields, manage the
appearance of the End User Interface and Staff Interface schemes, and
change the Tab Order.

5
Required Fields Window
• The Required Fields window is a single page that allows you to define how the
system displays required fields.
• The options selected in the Required Fields window apply to all users, and can be
defined separately for User-record fields and for Wizard fields.
You can define whether to use an asterisk* to denote a required field, where
to position the asterisk, or whether to use some other admin-defined text
through custom HTML.

6
Customizing Look and Feel Schemes
• Which Look and Feel scheme a staff user or end user sees is controlled by their
Primary Team.
• The Look and Feel menu allows you to give different groups of your customers, or
even internal departments, a distinct look and feel when they log in to the system.
• The End User and Staff Interface Look and Feel menus are essentially the same,
although options not available for end users are not present in the End User menu.
If users are still using the horizontal layout option, they will see different options. The
horizontal layout will be discussed in the following slides.
• Because the Staff Interface contains every possible option, we will walk through its
tabs here.

7
Customizing Look and Feel Schemes (continued)
• Click the Manage Staff Schemes button to open a table displaying the existing look and feel
schemes. To access the wizard, click the Edit icon for one of the existing schemes or click New
on the action bar.
• The wizard is comprised of tabs that govern each aspect of the interface. As you navigate
through the wizard you will set the options for each interface element.
The options that you select in the wizard will set the CSS properties that display how Agiloft
pages display in web browsers.

8
Look and Feel Wizard vs. Custom HTML
• It is important to understand that there is some overlap between the options in the
Look and Feel wizard and the custom HTML options elsewhere, such as within Field
wizards, the End User Interface, and the layout options in the Table wizard.
For example, the Look and Field wizard controls the default display of heading text in a
layout, but you can also use the HTML editor to change the appearance of an individual
text heading in the Layout tab of the table wizard.
Changes made in custom HTML sections will override the selections in the Look and Feel
wizard.
Record form text heading with custom HTML

9
Look and Feel Wizard and the EUI
• Agiloft offers two distinct end-user interfaces: the default HTML-based EUI and the Legacy
EUI. The Look and Feel scheme wizard for end users allows admins to customize all of the
Legacy EUI options, and some important aspects of the default EUI.
As a result, a few of the controls in the end user Look and Feel wizard apply to only the Legacy
EUI.
• For example, the Content tab of the Look and Feel wizard allows you to insert an HTML
header/footer in the staff interface and Legacy EUI.
• When you use the default EUI however, the header
and footer are governed by records in the EUI
Templates table.
In the default EUI, look and feel schemes apply
to the table views, record forms, advanced search
interface, and FAQ interface.

10
Global Tab
• The Global tab defines basic options that influence and control other aspects of the
look and feel scheme, such as the base scheme, font choices, and a set of colors
which are then available to apply to the various elements on subsequent tabs.
• The Select Base Scheme drop-down provides a list of existing scheme settings,
which you can use as a starting point for a new look and feel scheme.
• Base fonts define the default font choices for the scheme.
• If the user’s system does not have the Primary base font installed,
the system will attempt to use the Second or Third font to display text instead.
We recommend using only the most common fonts such as Arial, Verdana, and Times.

11
The Global Color Palette
• The color palette allows you to define up to 20
colors—either from a drop-down list or through
hexadecimal color codes—which can then be selected
when setting the appearance of other elements in the
system.
• Click a color icon to open the Select Color
window.
• Here you can choose colors either by moving the
cursor around the color selector, selecting a
predefined color from the palette, or defining the
color code by HSV or RGB coordinates.
Since HSV and RGB coordinates are alternatives,
entering one type will automatically convert the other.

12
Additional Global Tab Options
• The Global tab also sets the logo, the icon that
appears in the address bar, and the layout – vertical
or horizontal.
The horizontal layout has been deprecated.
• The layout options are different for Staff and End
User schemes in this tab, as shown here with Staff
on the top and End-User on the bottom.
Staff layout options:
End user layout options:

13
Change the Global settings
• Navigate to Setup > Look and Feel and click Manage Staff Schemes.
• Click New on the action bar.
• In the Global tab:
Select Light Orange from the Base Scheme drop-down and click Apply Scheme,
then in the confirmation dialog click OK.
Practice

14
Change the Global settings
• Define a range of new colors:
Color 1 – click the color icon.
In the Select Color dialog, enter RGB values of
195, 194, 218. Click Apply to close the window.
Color 2 – in the hexadecimal field, enter
F4F5F5.
Color 3 – click the color icon.
In the pop-up dialog, enter HSV values of 241,
52, 173.
Color 4 – click the color icon.
In the Select Color dialog, select a light blue
color using the color picker and slider.
Practice
Color 5 – use the drop-down to select
White.
Color 6 – in the hexadecimal field, enter
A1A1A4.
Color 8 – in the hexadecimal field, enter
616164.
Color 9 – click the color icon.
In the Select Color dialog, enter RGB values of 0,
37, 149.
Color 11 - in the
hexadecimal field,
enter 34B233.
15
Change the Global settings (continued)
• Next we’ll add a logo to the top-left corner of the staff
interface.
You can use the generic sample-logo.png file made available
with this unit, or any other image file you have on hand.
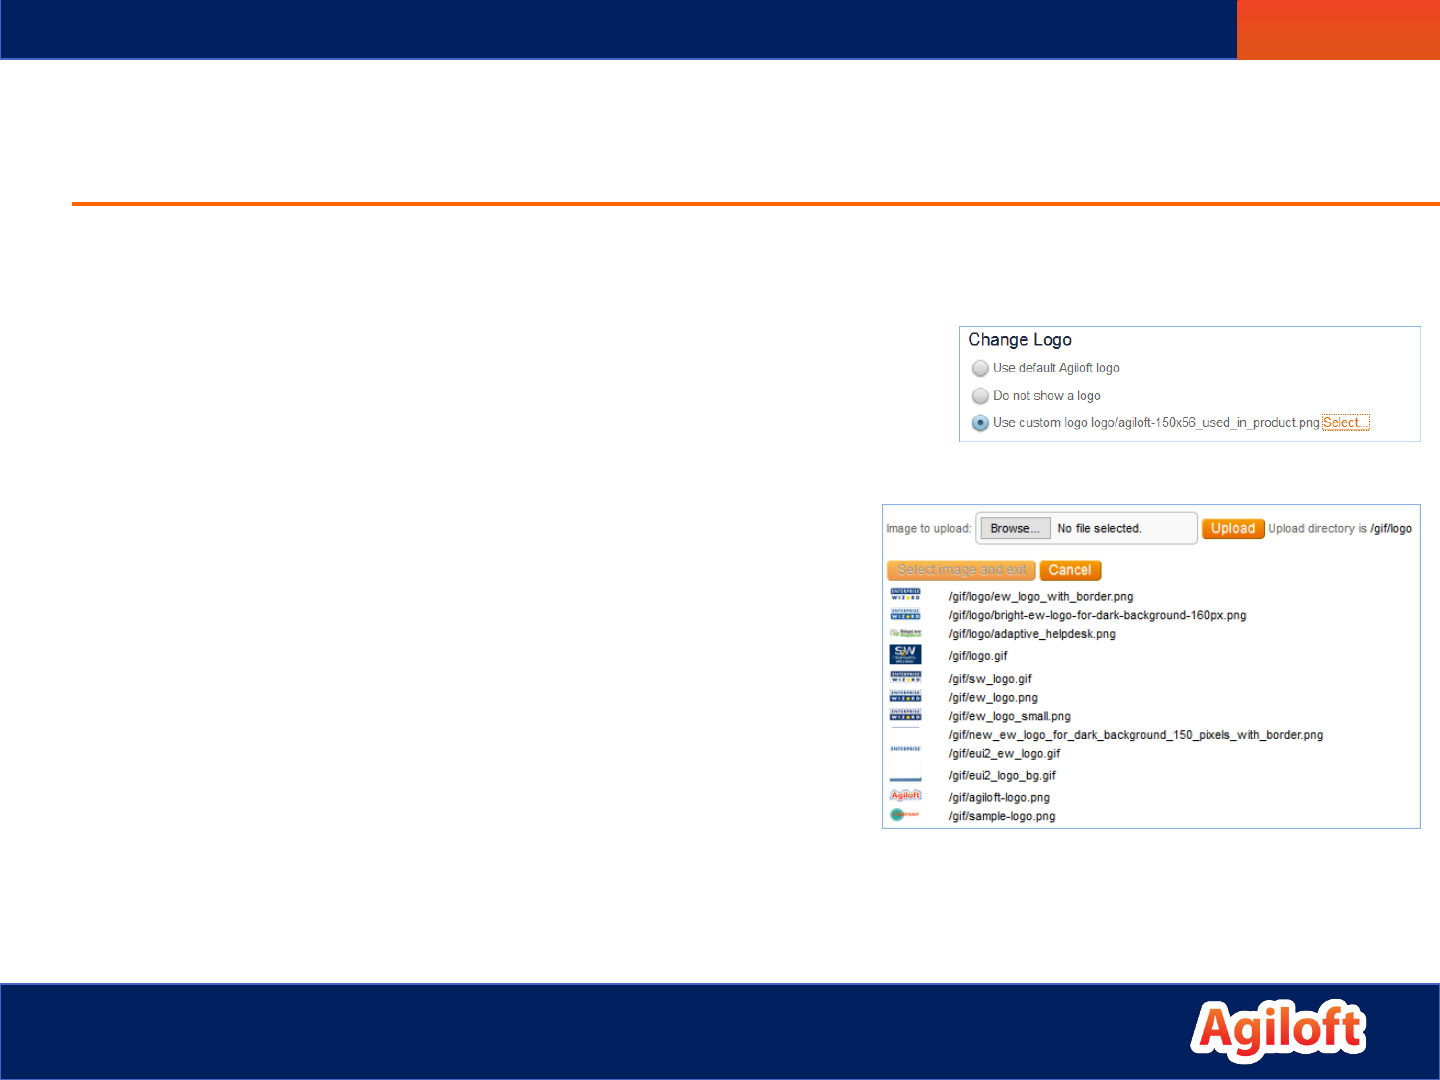
• In the Change Logo section:
Select Use custom logo, then click Select.
In the pop-up window, click Browse…
Navigate to the sample-logo.png file on your
desktop and select the logo.
Click Upload.
Select the image from the list once it has been
uploaded and click Select image and exit.
• Click Finish.
Practice

16
Apply the Scheme
Practice
• In the Apply tab, enter ‘Green Gray’ for the Scheme Name.
• Apply this scheme to Primary team members of any of
these teams, and select the Support Team.
• Click Finish again.
• On the next slide we’ll log in as a test user on the Support
Team to view the changes so far.
17
Logging in as a Test User
Practice
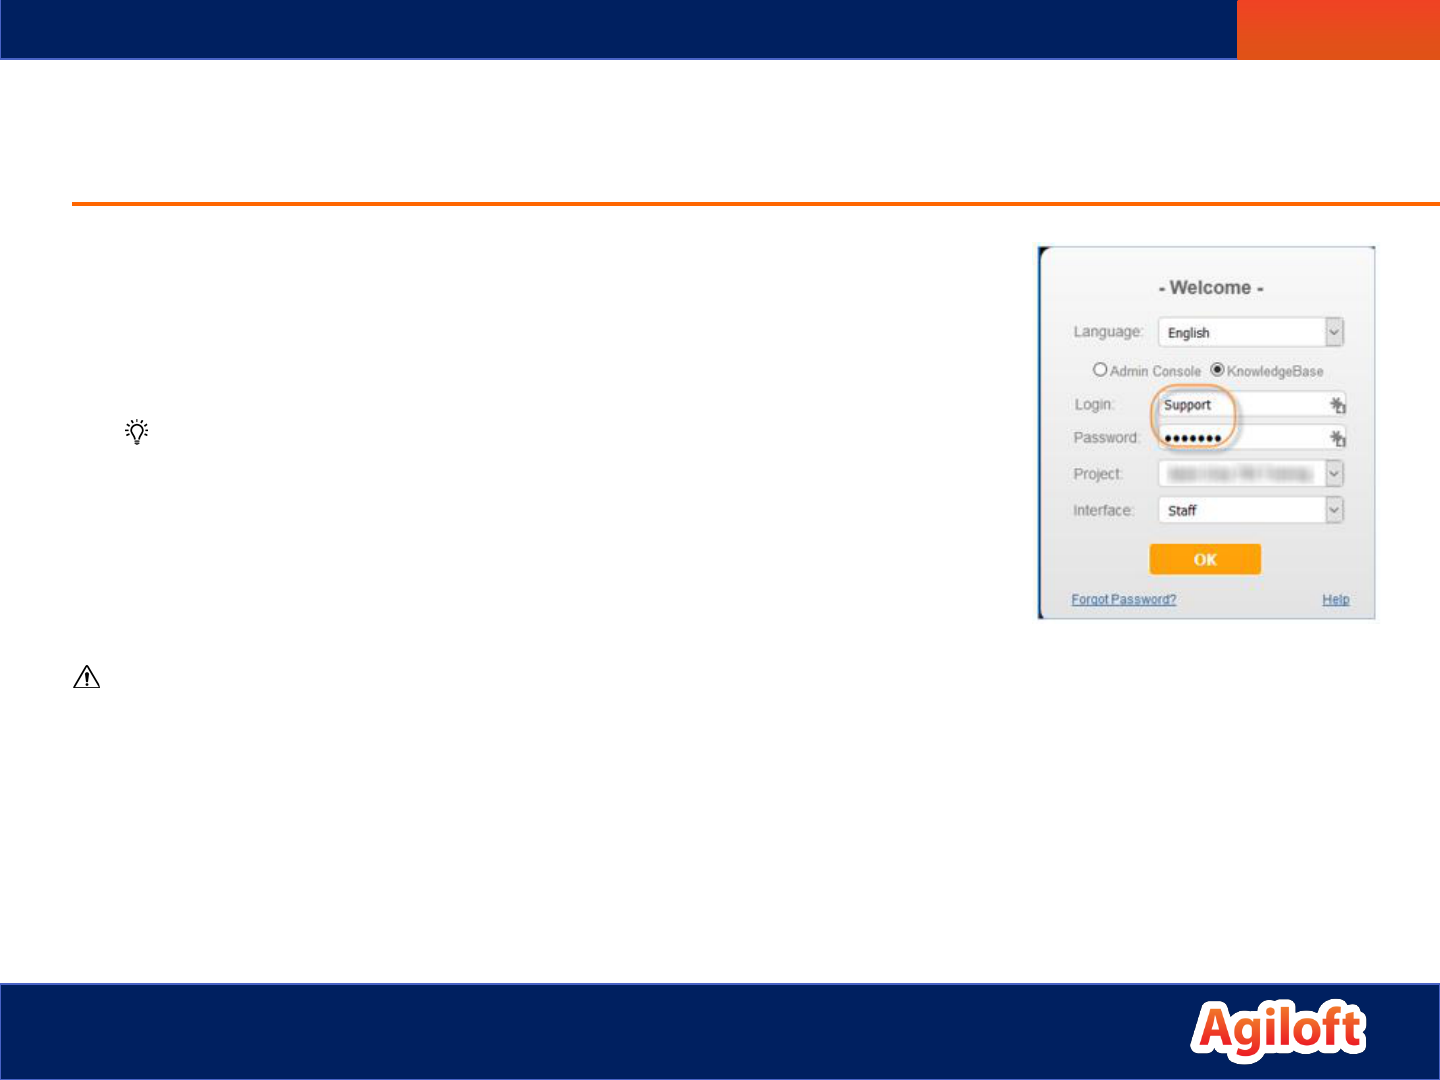
• Log out of the KB by clicking the Logout link in the upper-right corner.
This will redirect you to a login page.
• Here, enter support/support as the Login and Password details.
Be sure the name of your Training KB is selected in the Project field.
• Click OK.
• Open a few tables and records and to see how the navigational
elements and record forms appear.
Keep in mind that the changes made so far will appear strange while the scheme is under
development. Just follow along and it will all come together.
• In a separate browser window or tab, log into your Training KB as the admin user. This way
you can periodically view the changes as the support team user while you as the admin user
continue to modify the look and feel scheme.
18
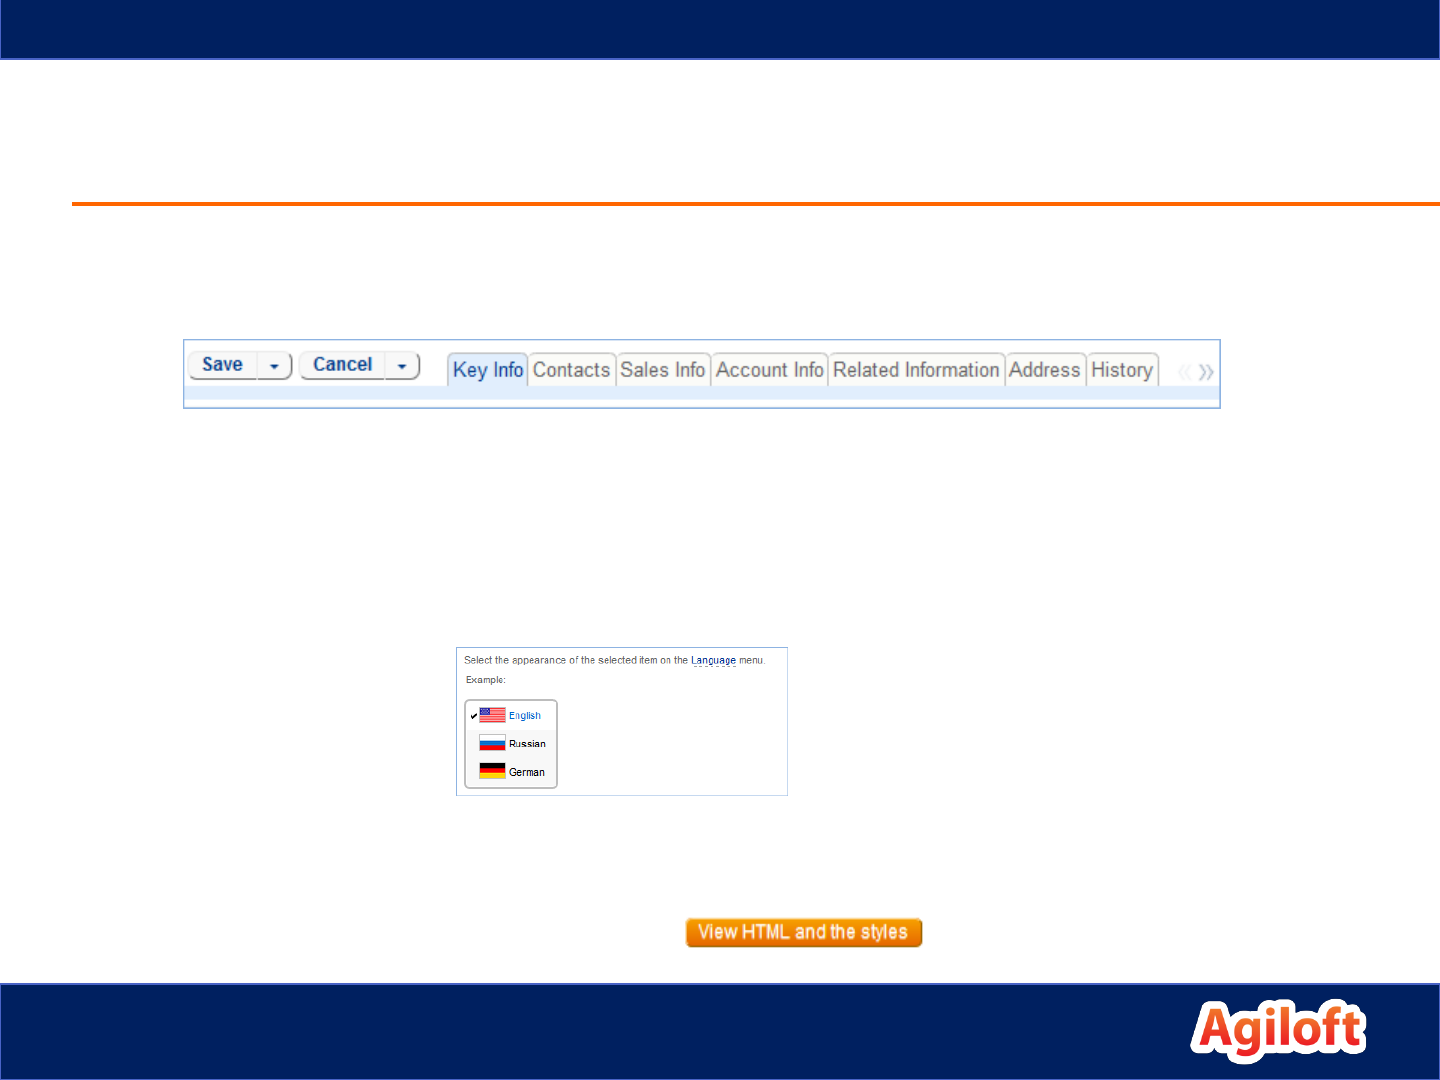
• The Toolbar refers to the navigational elements at the top of most windows. It displays the
tabs in a form and actions like Save, Cancel, Finish, and Next.
• The Toolbar tab customizes the appearance of these navigational tabs that appear in wizards
and records, as well as the tab toolbar and the mouse-over behavior of tabs.
• Additionally, you can configure the appearance of pull-down menus in the Toolbar, including
the language selection.
• The examples in the left hand column show in real-time how your new settings will look.
Clicking the View HTML and the Styles button opens a text view of the HTML and CSS that
make up the appearance of the element.
Toolbar Tab

19
• Navigate back to Setup > Look and Feel > Manage Staff Schemes and Edit the Green Gray
scheme again.
• Click the Toolbar tab.
• Make the following changes:
Change the Toolbar Settings
Practice
Wizard’s Tabs – Font Color 6
Wizard’s Selected Tab – Font Color White, Background Color 11
Wizard’s Mouse-Over Tab – Font Color 6
Selected Menu Item – Font Color 7, Background Color 11
Menu Items – Font Color 8, Background Color 2
Language Menu (Selected Item and on Mouse-Over) – Font Color
7, Background Color 11
• Click Finish, then in the Apply tab click Finish again.

20
Left Pane or Other Tab
• Depending on whether you are editing the End User or the Staff Interface, and
whether you are using a Horizontal or Vertical toolbar, this tab will display different
options.
For End Users, this tab is called Other and includes the Calendar and the settings for the Go
button on the search pane.
For Staff Users, this tab is called Left Pane and
controls the Calendar as well as the appearance
of the left pane, which is only visible for staff users.
• Note that in this image, the Font Face is set to
Use Primary Font. Remember, the Primary Font
is set in the Global tab.

21
Change the Left Pane Settings
• Navigate back to Setup > Look and Feel > Manage Staff Schemes and Edit
the Green Gray scheme again.
• Click the Left Pane tab.
• Make the following changes:
Tool Title – Font Color 8, Background Color 2, Image None.
Pane Body – Font Color 8,
Background Color White
Left Panel Mouse-Over – Font Color 8
• Click Finish, then in the Apply tab click Finish again.
• View the changes in the look and feel of the KB.
Practice

22
Body Tab
• The Body tab controls the appearance of the
background, including the background color or
gradient and whether to tile the background
image.
• This tab also controls the appearance of hyperlinks,
titles, and status messages.
• Other items in this tab include the scroll bars that
appear in Internet Explorer, and the appearance of
the Go button for Staff users.

23
Change the Body settings
• Navigate back to Setup > Look and Feel > Manage Staff Schemes and Edit the Green Gray
scheme again.
• Click the Body tab and make the following changes:
In the Background section, define a background gradient.
Select as a Start Color #84E263
Select as an End Color Color 11
User Info/Language Bar – Hyperlink and Font Color White
Links – Font Color 4
Mouse-Over Link – Font Color 11
In the Go Button section:
Change the Mouse-Over Background Color to #84E263
Change the Click Background Color to #212121
• Click Finish, then in the Apply tab click Finish again.
Practice

24
Tables Tab
• The Tables tab controls the appearance of tables within the system.
• Options on this tab include:
Action bar
Header row
Font choices
Cell size
Color scheme.

25
Change the Table Settings
• Navigate back to Setup > Look and Feel > Manage Staff Schemes and Edit the Green
Gray scheme again.
• Click the Tables tab and make the following changes:
Action Bar – Font Color 8,
Define a Gradient from top to bottom with Start Color White, End Color 6
Action Bar on Mouse-Over – Font Color 6, Background Color White
Table Header – Font Color 8
Even Rows – Font Color 8
Odd Rows – Font Color 8, Background Color 7
Wide Cells in Odd Rows – Font Color 8, Background Color 2
General Background for tables – Background Color #FFFFFF
• Click Finish, then in the Apply tab click Finish again.
Practice

26
Forms Tab
• The Forms tab enables you to set the
appearance of the elements in
a record form.
• These include the following items:
Record input fields
Background appearance
Widget title
Navigation buttons
Pop-up hints
Error messages and warnings
The table tree

27
Change the Forms Settings
• Navigate back to Setup > Look and Feel > Manage Staff Schemes and Edit the Green Gray
scheme again.
• Click the Forms tab and make the following changes:
Common Field Area – Delimiter Color 8, Background Color White
Form Background Color and Labels – Font Color 6, Background Color White
Custom Field Labels and Form Title – Font Color 8
Home Page Background – Font Face Helvetica, Font Color 6, Background Color White
Widget Title – Font Color White, Background Color 6
Navigation Buttons – Font Color 8, Background Color OS Color: Menu, Border Color 1
Navigation Buttons Active – Background Color 5
Navigation Buttons Mouse-Over – Background Color 6
Form Action Buttons – Font Color White, Background Color Gray, Image None, Border Color 1
Form Action Buttons Mouse-Over – Background Color OS Color: Button Text
User Input – Font Color 8, Background Color White
Heading Text – Font Color White, Background Color Gray
Practice

28
Change the Forms Settings (Continued)
• Click Finish, then in the Apply tab click Finish again.
• Test the changes in your KB forms as the support user.
At this point, the new color scheme should be complete. Bearing in mind that this is just a sample, go through the
KB and see how the elements that you changed in the exercises have affected the appearance.
• Navigate back to Setup > Look and Feel.
Practice
29
Printing and Icons Tabs
• The Printing tab controls how a record will look when
opened in view-only mode for printing. These
elements include the background color, label and field
displays, and input instruction text on record views.
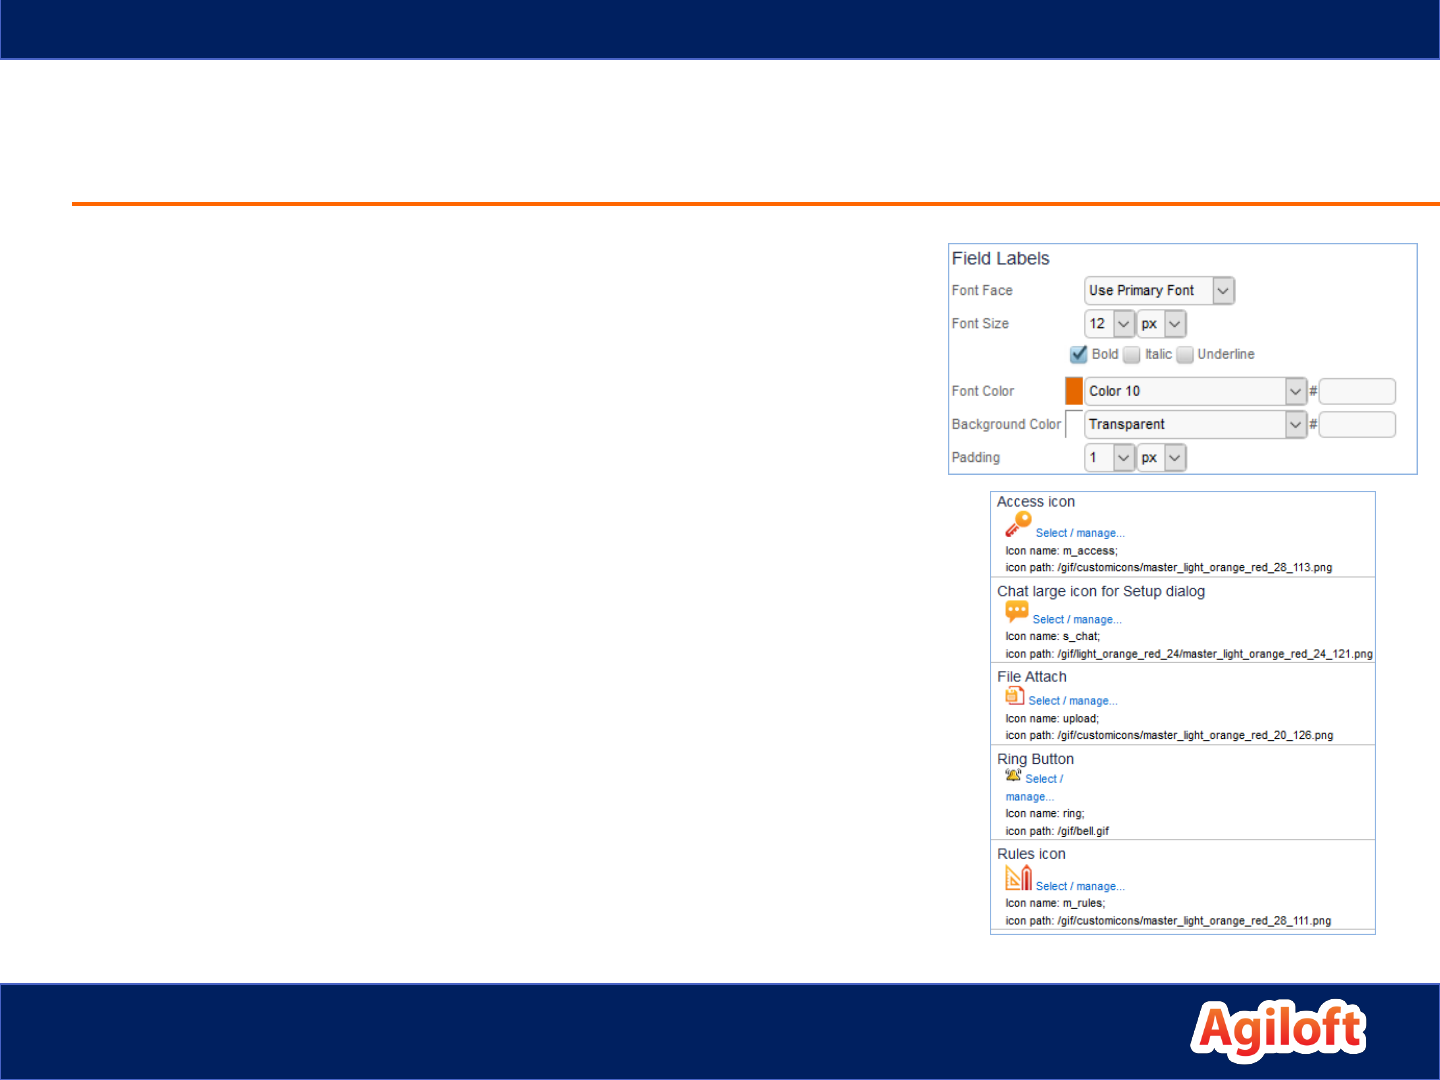
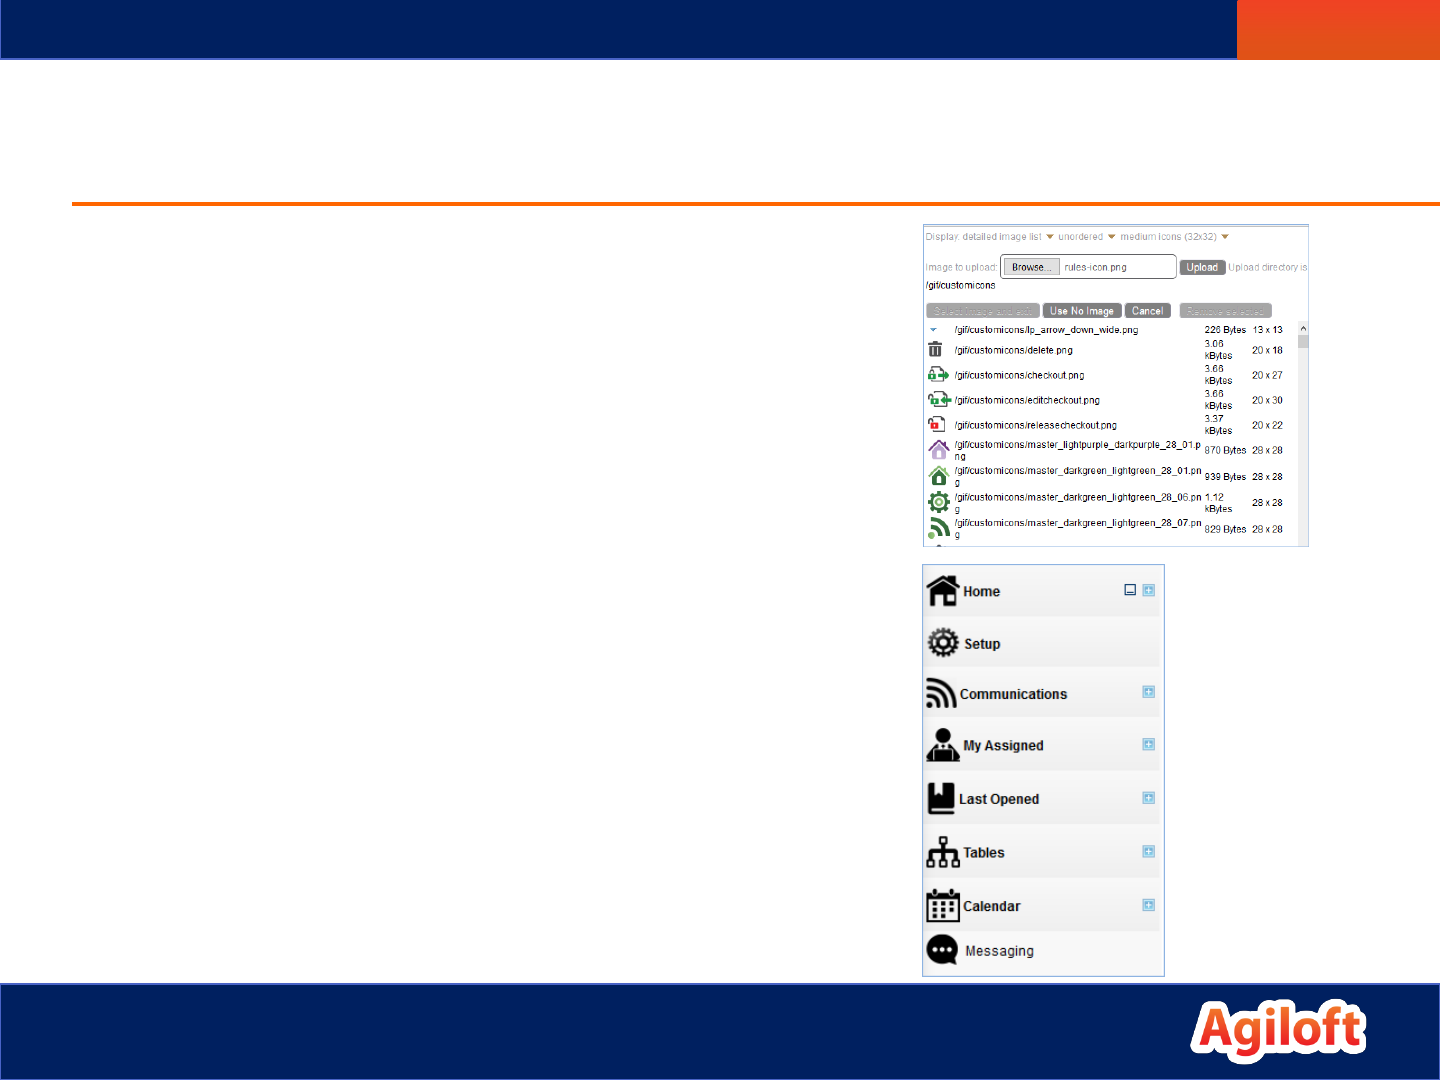
• The Icons tab displays a list of every icon in the system
except table icons, and allows the user to select an
icon to replace the default, or use no icon. To change
the icon…
Click Select / manage...
Either click Browse to upload an image, or select an image
from the list.
Click Select image and exit.

30
Create a Custom Icon Set
• Navigate back to Setup > Look and Feel > Manage Staff Schemes and Edit the Green Gray
scheme again.
• In the Icons tab, click Select/manage under the Access icon.
• Click Browse.
Navigate to the practice-icon-set folder on your desktop.
In the pop-up window, select access-icon.png and click Open.
Click Upload.
Scroll down to the bottom of the page to locate the
icon, select it and click Select image and exit.
• The icon will be refreshed on the screen:
• Perform the following steps to replace each icon:
Click Select/manage… next to an icon.
Browse for, open, and upload the icon from the practice-icon-set folder.
Select the icon from the list and click Select image and exit.
• On the next slide, we’ll continue updating several icons.
Practice
31
Create a Custom Icon Set (continued)
• Replace the following icons:
Home icon with home-icon.png
Chat icon with chat-icon.png (Messaging)
Setup icon with setup-icon.png
My Assigned icon with my-assigned.png
Last Opened icon with last-opened.png
Email icon with email-icon.png (Communications)
Tables icon with tables-icon.png
Calendar icon with calendar-icon.png
• Click Finish, then in the Apply tab click Finish again.
• View the changes in the look and feel of the KB.
• Navigate back to Setup > Look and Feel.
Practice

32
Content Tab
• The Content tab enables you to create custom headers and bottom sections to any
Staff interface page by using HTML or uploading an image.
The End User interface also allows the use of custom HTML, but this is limited to areas of
the system that do not contain interactive elements like table views and record forms.
HTML can be entered
manually into the HTML
text field, created within
the HTML editor, or
uploaded as a text file.

33
Apply Tab
• The Apply tab defines which teams the look and feel will apply to, whether the scheme
will be the default for new teams, and whether the scheme name will be changed.
• The ability to define a different look and feel for separate teams enables you to
personalize the appearance of Agiloft to each environment, enabling your major
customers to see their own logo in the End-User Interface, or provide visually impaired
staff with a larger font.
• In the Scheme Name section you
can define a name or leave the
current scheme name.
• The Apply this scheme to section
defines the teams that will see the
Look and Feel scheme.
• Click Finish to leave the Staff
Scheme and return to the Look
and Feel window.

34
Edit Tab Order
• The Edit Tab Order window, accessible by clicking Edit Tab Order in the Look and
Feel window, defines the order in which the tabs and tables are displayed in the
Toolbar of the Staff interface.
The top list shows the order in which
tables appear in the Tables section.
The bottom list shows the ordering
of the menu items in the left pane
such as Home, Communications,
and Last Opened.
• To reorder the tabs, drag and drop them to their desired position.
Left-to-right in this window corresponds with top-to-bottom in the left pane.
• All changes will be made upon the next login and will apply to all staff users.

35
Look and Feel Recommendations
When you want to modify a look and feel scheme, we recommend creating
a new scheme and saving it under a new name. You can still use the existing
scheme as a base by clicking Apply Scheme on the Global tab. This allows
you to test your changes and then either revert or refer to the original
scheme.
• Find good color options by browsing your organization’s or client’s website.
Pay close attention to the colors used in graphics, icons, logos, backgrounds,
buttons, text, headings, and hyperlinks.
• Ask your client or other people at your organization for feedback. Try
showing them a couple of different schemes.

36
Basic Look and Feel Recipe
• This ‘recipe’ comes from our years of experience customizing KBs for our
customers.
• Start with the Light Orange scheme as a base. It is a neutral scheme that
can be quickly changed to match a client organization’s color scheme.
• By changing colors 1, 2, 9, and 10 of the global palette, you can quickly and
easily make a striking difference to the user experience.
• Find two hues (preferably contrasting) from the client’s website or logo.
These will serve as the basis for the look and feel scheme.
An eyedropper or color picker browser extension, such as ColorZilla or ColorPicker can
be extremely helpful to find colors and retrieve their hexadecimal codes from a
webpage.

37
Basic Look and Feel Recipe (cont.)
• For example, in the generic logo to the right
we find the following colors:
Green; #00CD5E
Blue; #0069C1.
• Use one of the two main hues as Color 1, and the other as Color 9.
Keep in mind that gradients made from colors 1 and 2, such as the header bar, will appear in the
UI with 1 as the lower color, and the gradients made from 9 and 10 will appear with 10 as the
lower color.
In this example we would use Green as Color 1 and Blue for Color 9.
• If the website or logo contains any shades of the same hue (e.g., in a gradient from light to dark
blue), use the second shades to complement the other chosen colors.
To find a lighter or darker shade, enter the hex code for the original color in the color picker, then
select the color icon and adjust the saturation level. Several tools on the web can also find
complementary or matching hues.
In this example, we can use Dark green #00934E for 2 and Dark blue #2644BF for 10.

38
Basic Recipe Example
• Here is the new look and feel scheme created from the recipe:

39
• In this unit we have learned:
• How to create and edit look and feel schemes.
• How look and feel schemes interact with the EUI templates table.
• How to incorporate your organization’s logo and color scheme into the interface.
• How to apply different look and feel schemes to different user Teams.
Look and Feel Unit Summary
