

FLAG.DOL.GOV
2
Table of Contents
How to Submit Form ETA-9089 Application in FLAG.DOL.GOV .................................................................... 5
How to Link a Prevailing Wage Determination (PWD) Application to an ETA-9089 application .................. 9
Employer Information ................................................................................................................................. 11
Employer Point-of-Contact Information ..................................................................................................... 12
Attorney or Agent Information ................................................................................................................... 13
Foreign Worker Information ....................................................................................................................... 14
Job Opportunity and Wage Information ..................................................................................................... 15
Worksite Information .................................................................................................................................. 17
Additional Worksites ................................................................................................................................... 20
Other Definable Geographic Area(s) ........................................................................................................... 21
Additional Job Opportunity Information and Other Requirements ........................................................... 22
Professional/Non-Professional Recruitment Information .......................................................................... 24
Additional Recruitment Requirements for Professional Occupations ........................................................ 25
Notice of Posting ......................................................................................................................................... 26
Employer Labor Condition Statements ....................................................................................................... 27
Preparer ...................................................................................................................................................... 28
APPENDICES ................................................................................................................................................ 29
Appendix A.A - Foreign Worker Contact Information ............................................................................. 29
Appendix A.B - Foreign Worker Education ............................................................................................. 31
Appendix A.C - Foreign Worker Training Qualifications ......................................................................... 33
Appendix A.D - Foreign Worker Skills ..................................................................................................... 35
Appendix A.E - Foreign Worker Work Experience .................................................................................. 37
Appendix B – Additional Worksite Information ...................................................................................... 39
Appendix C – Supplemental Information ................................................................................................ 42
Appendix D – Special Recruitment for College and University Teachers................................................ 45
Application Documents ............................................................................................................................... 46
Review and Submit ..................................................................................................................................... 47
Form Submission ......................................................................................................................................... 52
Withdraw Submitted Application ............................................................................................................... 55
Addendum A ............................................................................................................................................... 58

FLAG.DOL.GOV
3
How to link a Prevailing Wage Determination (PWD) that is not in your FLAG account to your ETA-
9089 application...................................................................................................................................... 58
Addendum B ............................................................................................................................................... 60
How to navigate and use the Cases tab and Notification Center. .......................................................... 60
Introduction to Cases .......................................................................................................................... 60
Introduction to Cases .......................................................................................................................... 63
Search for Cases .................................................................................................................................. 65
Introduction to Notification Center .................................................................................................... 68
Addendum C ............................................................................................................................................... 70
How to use the Actions menu. ................................................................................................................ 70
Withdraw ............................................................................................................................................ 70
Request for Information (RFI) ............................................................................................................. 72
Request Extension ............................................................................................................................... 74
Audit Actions ........................................................................................................................................... 76
Audit Response ....................................................................................................................................... 77
Audit – Request for Information ............................................................................................................. 79
Request for Reconsideration .................................................................................................................. 80
Request for Review ................................................................................................................................. 82
Withdraw From Appeals ......................................................................................................................... 84
FLAG.DOL.GOV
4
*Foreign Labor Application Gateway (FLAG) has been optimized to work with Google Chrome, Safari,
and Mozilla Firefox.
Note: This document does not replace the Office of Management and Budget (OMB) approved form
instructions. Please reference the OMB approved form instructions for further details in completing the
form.
General Instructions:
• Your response to preliminary questions will determine the mandatory fields and/or appendices
that you will be required to complete.
• Each question in the form will feature a question mark symbol. Placing your cursor over this
symbol will provide further details as documented in the 9089 form instructions.
• To upload files in FLAG, select “browse” and select the file you wish to upload. Please note that
the file types are limited to pdf, doc, docs, txt, xls, and xlsx. The maximum file size is 30MB.

FLAG.DOL.GOV
5
How to Submit Form ETA-9089 Application in FLAG.DOL.GOV
1. Ensure that you have created an account using Login.gov. Please use your Login.gov credentials
to access Foreign Labor Application Gateway
.
Note: For detailed Video Tutorials and User Guides on How to Create a FLAG Account, Logging
into FLAG, and Navigation in Your FLAG Account or Profiles, please go to the Support tab on
FLAG and click on Video Tutorials or User Guides.
2. Once logged in, the “New Application” tab will automatically launch. The “New Application” tab
is used to begin the application process.
3. Select “Form ETA-9089" under “PERM” to begin filling out an ETA-9089 application.

FLAG.DOL.GOV
6
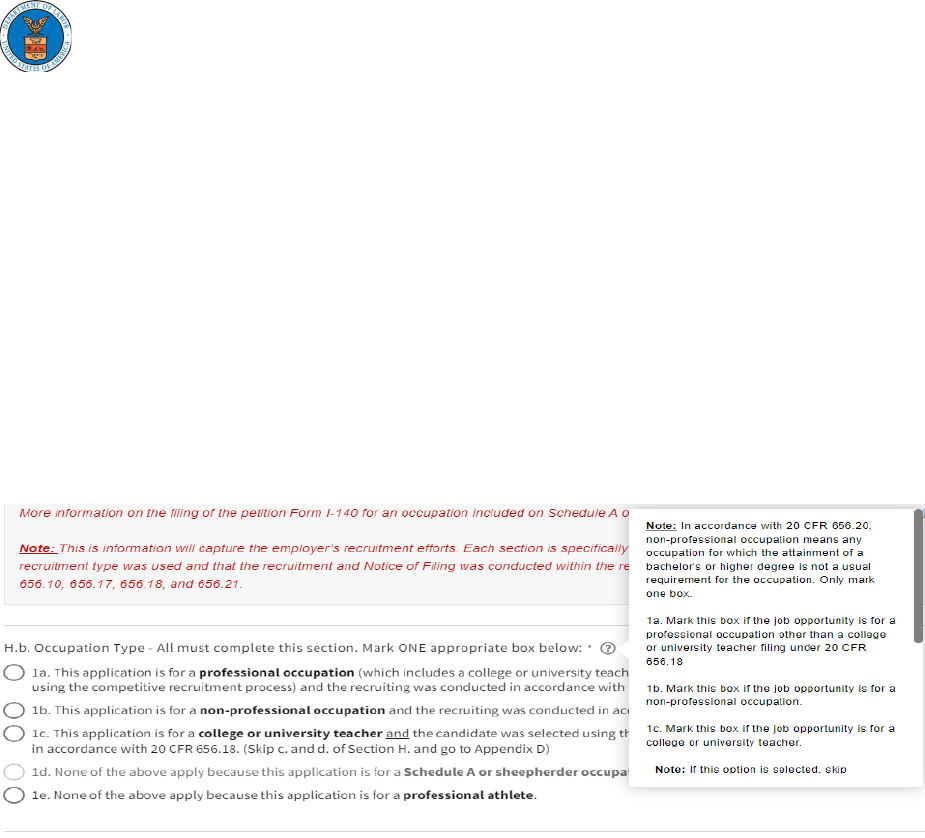
4. Preliminary Questions: Select the occupation type (H.b.) for your application by selecting the
appropriate radio button.
5. If you select the radio button indicating the application is being filed for a professional, non-
profession occupation or a college or university teacher using the competitive recruitment
process, you will be prompted to indicate if the application must conduct supervised
recruitment.

FLAG.DOL.GOV
7
6. If you are not required to go through supervised recruitment, select “No” for question H.a., and
click “Continue” to the next question.
7. If you are required to undergo supervised recruitment select “Yes” and upload the Notice of
Supervised Recruitment (NSR).
8. To upload file(s) in FLAG, select “browse” and upload the NSR. Please note that the file types
are limited to pdf, doc, docs, txt, xls, and xlsx. The maximum file size is 30MB.

FLAG.DOL.GOV
8
9. If you inadvertently selected the wrong document to upload, select the “Clear” button to
remove the document, and upload the correct document.
* IMPORTANT: regardless of what document(s) is uploaded in FLAG, once you submit the application,
the document(s) cannot be deleted by you nor the Office of Foreign Labor Certification (OFLC).

FLAG.DOL.GOV
9
How to Link a Prevailing Wage Determination (PWD) Application to an
ETA-9089 application
1. To submit an online ETA-9089 application in FLAG, you must link a PWD application to the PERM
application. To link a PWD, select “PWD Case Lookup”. This will bring up a pop-up window
where you can select the valid PWD case number issued by the Department of Labor to identify
the job opportunity and prevailing wage(s) covered by the application. Locate the Form ETA-
9141, PWD, obtained for the job opportunity from the list and select the checkbox to the left of
the PWD case number and click the “Continue” button.
2. After a PWD is linked to the application, a notification message requiring you to Go Back or
“Acknowledge & Finish”.
3. Once your PWD is linked to the application, the PWD case number will be listed as in the
example below. Click the “Linked 9141” to see the PWD or click “Clear” to remove the PWD
case number and link a new PWD. When ready, click the “Continue” button to complete the
application or select the “Save & Quit” button to complete the application at a later date. To
find unsubmitted cases, please review the Initiated cases list in your Cases menu.

FLAG.DOL.GOV
10
4. If no PWD was created, click on “Create ETA-9141 Application”.

FLAG.DOL.GOV
11
Employer Information
1. Fields in this section will be pre-populated from your linked PWD. Verify information in the
fields are correct and complete mandatory fields.

FLAG.DOL.GOV
12
Employer Point-of-Contact Information
1. Fields in this section will be pre-populated from your linked PWD. Verify information is correct
and complete mandatory fields.

FLAG.DOL.GOV
13
Attorney or Agent Information
1. Fields in this section will be pre-populated from your linked PWD.
2. For question C.1., select the Employer’s type of representation.
3. An attorney/agent can be selected from the profiles dropdown options to populate this section,
or you can manually enter the information. If unrepresented, select “None.” Click “Continue” at
the bottom of the screen.
Conditional fields
appear when
Attorney/Agent is
selected is

FLAG.DOL.GOV
14
Foreign Worker Information
1. Appendix A is the Foreign Worker’s information, which consists of the foreign worker’s contact
information, education, qualifications, skills, abilities and proficiencies, and work experience.
The employer can go directly to Appendix A by selecting the “Go to Appendix A” link under
questions D.1.
2. Choose the appropriate answer for question D.2.
Link to
Appendix A section of User Guide.
FLAG.DOL.GOV
15
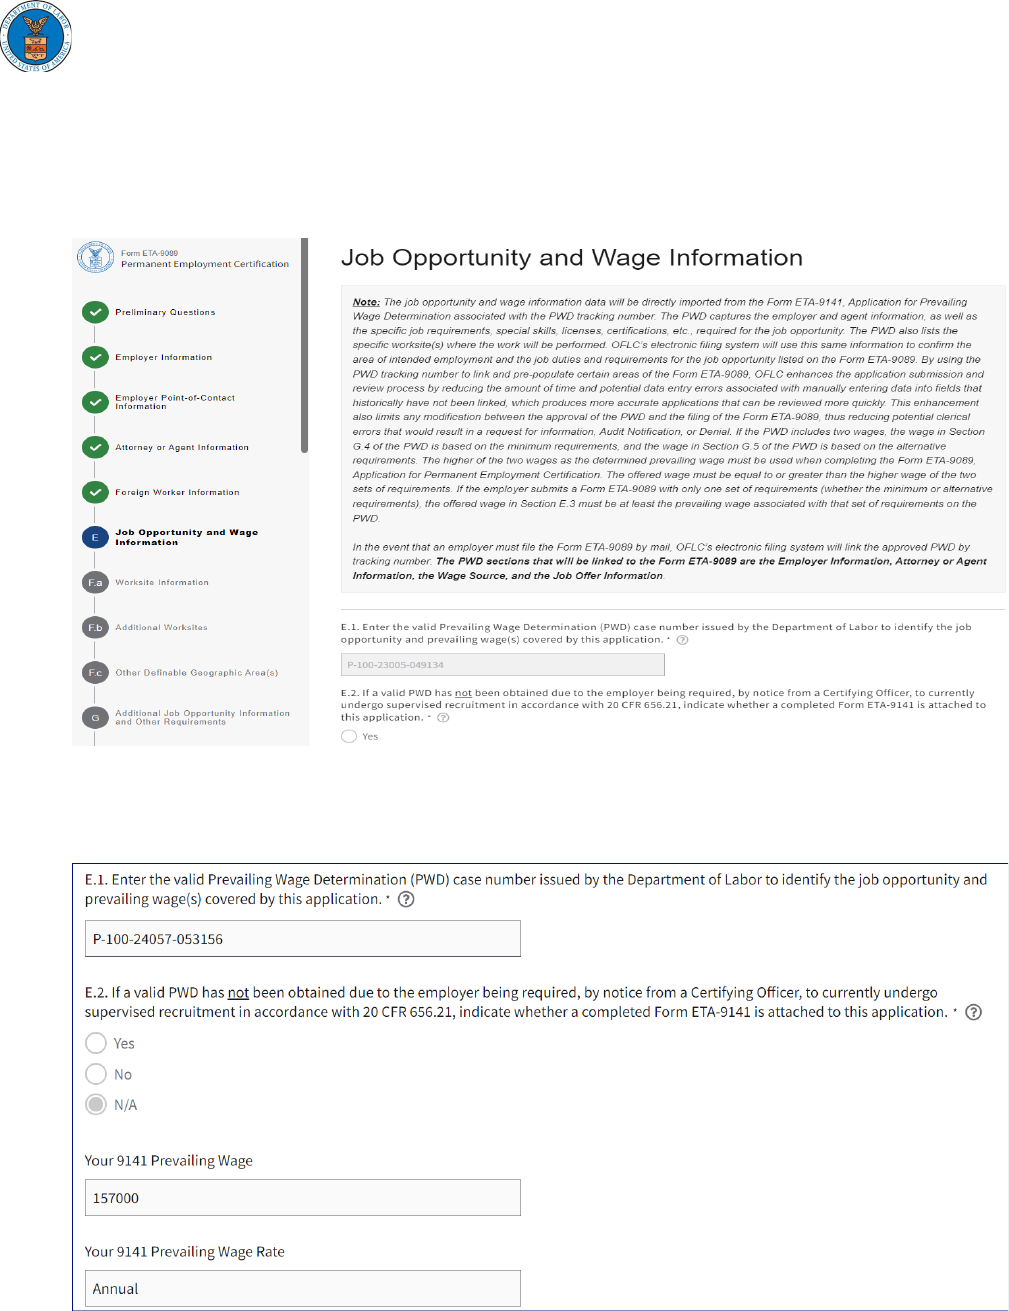
Job Opportunity and Wage Information
1. Under Job Opportunity and Wage Information, fields E.1 and E.2 were pre-populated from your
linked PWD form. Note that these fields are grayed out and cannot be edited.
2. If the incorrect PWD case number was linked to the PERM application, the employer can go back
to the preliminary question section and link the correct PWD case number to the application.
The employer must verify all fields are accurate and complete.

FLAG.DOL.GOV
16
3. Enter the wage date into the Offered Wage fields (E.3. – E.5.) and click the “Continue” button at
the bottom of the page.

FLAG.DOL.GOV
17
Worksite Information
1. If your linked PWD has one worksite identified, the worksite information from your PWD will be
pre-populated for you in Section F.a. Enter the appropriate response to question F.a.1. Click
“Continue”.
2. If the linked PWD has multiple worksites identified, you will see a blue bar as shown below with
a “Select Worksite” button. Click “Select Worksite”. The system will provide a list of worksites
indicated on the linked PWD.

FLAG.DOL.GOV
18
3. Select the radio button for the worksite you want and click “Finish”. The worksite information
from will be pre-populated in Section F.a. To add additional worksites, select Yes to question
F.b.1.

FLAG.DOL.GOV
19
4. Complete field F.a.1 to indicate the type of worksite location. Click “Continue”.
5. If you choose “No one specific worksite address or physical location” some of the responses to
questions in section F.a. will indicate “N/A” and you will be prompted to continue to section F.b.
Additional Worksites. Click “Continue”.

FLAG.DOL.GOV
20
Additional Worksites
1. If you have multiple worksites, they should have been identified in Appendix A of your linked
PWD. If you have multiple worksites, select “Yes” to question F.b.1. You will also have to
complete Appendix B.
Note: if you selected “No one specific worksite address or physical location” in question F.a.1, the system
automatically puts in a “Yes” in question F.b.1 and the “No” response is grayed out.
Link to Appendix B
section of this user guide.

FLAG.DOL.GOV
21
Other Definable Geographic Area(s)
1. In question F.c.1., enter the geographic area(s) where work will be performed.

FLAG.DOL.GOV
22
Additional Job Opportunity Information and Other Requirements
1. Respond to questions G.1. through G.12. If you decide to change your answer to any of these
questions, please select “Clear” next to each question. This will clear the initial and dependent
fields.
2. Questions G.6. – G.12. will determine if an Appendix C is required as part of the PERM
application. If you answer “Yes” to any of these questions, you will need to complete Appendix C
to provide additional information for these questions. Click “Continue”.


FLAG.DOL.GOV
24
Professional/Non-Professional Recruitment Information
1. Answer questions H.c.1a through H.C.3b. Click “Continue”.
Note: If your selected occupation type is Professional Athlete OR college or university teacher selected
using the competitive recruitment process, the system will automatically mark this section “complete” as
this section is not needed.

FLAG.DOL.GOV
25
Additional Recruitment Requirements for Professional Occupations
1. If you selected professional occupation in the preliminary questions, you will be required to
identify at least 3 additional recruitment steps.
2. Check the appropriate boxes next to the recruitment event. Enter “From” and “To” dates using
the date picker or manually input using the mm/dd/yyyy format.
3. If you need to delete an entry, uncheck the box next to the recruitment event and click the x
next to date entry in the date fields. Click “Continue”.
Note: If your selected occupation type is Non-Professional, Professional Athlete OR College or University
Teacher selected using the competitive recruitment process, the system will automatically mark this
section “complete” as this section is not needed.

FLAG.DOL.GOV
26
Notice of Posting
1. Select one or more checkboxes for Notice of Posting then click “Continue”.

FLAG.DOL.GOV
27
Employer Labor Condition Statements
1. Read the employer attestations, check the “I certify” box, and then click “Continue”.

FLAG.DOL.GOV
28
Preparer
1. Complete this section only if the Preparer of this application is a person other than
the Employer Point of Contact or the Attorney/Agent. This section is not required. Click
“Continue.”

FLAG.DOL.GOV
29
APPENDICES
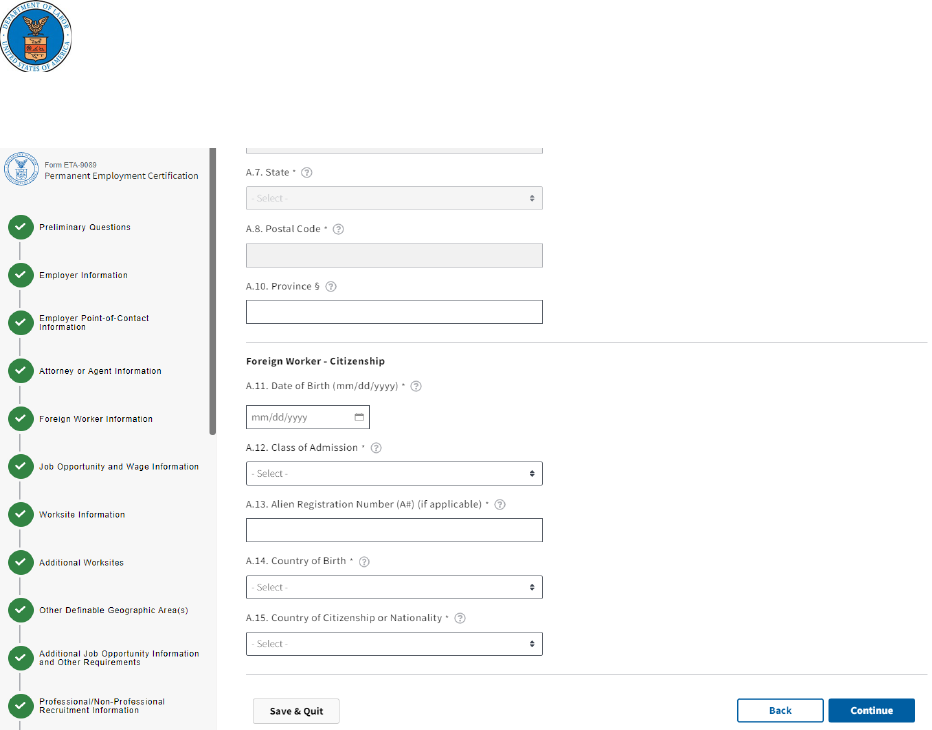
Appendix A.A - Foreign Worker Contact Information
1. Under Foreign Worker, enter the mandatory information.
2. Enter Foreign Worker address information.
FLAG.DOL.GOV
30
3. Enter Foreign Work Citizenship Information and click “Continue”.

FLAG.DOL.GOV
31
Appendix A.B - Foreign Worker Education
1. Click on the blue hyperlink “+ Add Foreign Worker Education”.
2. Complete fields 1 – 1.e. for any education relevant to job opportunity and click Save.

FLAG.DOL.GOV
32
3. Under “Actions”, you can click “Edit” to modify or remove the education information you
entered.

FLAG.DOL.GOV
33
Appendix A.C - Foreign Worker Training Qualifications
1. Click on the blue hyperlink “+ Add Foreign Worker Training”.
2. Complete fields 1 – 1.e. for the institution, school, or training provider that conducted the
foreign worker training and click Save.
3. Under Actions, you can click “Edit” to modify or remove the training information you entered.

FLAG.DOL.GOV
34

FLAG.DOL.GOV
35
Appendix A.D - Foreign Worker Skills
1. Click on the blue hyperlink “+ Add Skills, Abilities, and Proficiencies”.
2. Complete fields 1 – 1.c. for the employer, institution, school, or training provider in which the
foreign worker attained the skills, abilities, and/or proficiencies and click Save.

FLAG.DOL.GOV
36
3. Under Actions, you can click “Edit” to modify or remove the training information you entered.

FLAG.DOL.GOV
37
Appendix A.E - Foreign Worker Work Experience
1. Click on the blue hyperlink “+ Add Foreign Worker Work Experience”.
2. Complete fields 1 – 1.l. for the business, person, association, firm, corporation, or organization,
i.e., the employer that employed the foreign worker and click Save.

FLAG.DOL.GOV
38
3. Under Actions, you can click “Edit” to modify or remove the work experience information you
entered.

FLAG.DOL.GOV
39
Appendix B – Additional Worksite Information
1. Click on “Add Worksites”. You can only add worksites identified in Appendix A of the Form ETA-
9141 PWD application. In the Add Worksite(s) pop-up box, select the worksite(s) and click on
Finish.

FLAG.DOL.GOV
40
2. If you have more than one worksite identified in your linked PWD, you can select to add one at a
time or all of them at once. Click Finish.
3. You will see all the worksites you’ve added as shown below. If you added worksites in Appendix
A of your PWD that span different states and/or counties within the same MSA/OES area code,
you can click on the down arrow to change state and county of the worksite(s) that applies to
this application.

FLAG.DOL.GOV
41
4. If your application requires more worksites within the same MSA / OES area code, you can select
a worksite on the list, scroll right to the Actions column for that worksite, click on the “ellipsis”
and click on “Copy”.
5. To remove a worksite you added, click on the “ellipsis” for that worksite and select “Remove”.

FLAG.DOL.GOV
42
Appendix C – Supplemental Information
1. If you answered “Yes” to any of the questions 6 – 12 under Section G on the Form ETA-9089, you
are required to complete this appendix.
2. Click on the blue hyperlink “+ Add Supplemental Information” and click “Continue”.

FLAG.DOL.GOV
43
3. Click on the down arrow for question “1 Section and Item Number”. You will see the list of
questions from Section G for which you answered “Yes”.
4. Select the first item on the list and complete question 1.b for the item you selected. You can
click on the question mark tooltip “?” for instructions. Click Save when finished. Note that
question 1.a has been filled in for you based on the short description for that question in Section
G.

FLAG.DOL.GOV
44
5. Repeat steps 2 through 4 until you have provided the required responses for all sections and
item numbers on the list. You will see a clean Appendix C section with no error bar on the top of
form.
6. You will see a clean Appendix C section with no error bar on the top of form.

FLAG.DOL.GOV
45
Appendix D – Special Recruitment for College and University Teachers
Note: This Appendix is required only if you selected the Occupation Type of College or University
Teacher, and a competitive recruitment process was used.
1. Enter the date the foreign worker was selected for the position in question 1.
2. Enter at least one national professional journal, educational organization publication, or other
publication and the date in which advertisement was placed.
3. Describe all other recruitment conducted and sources used if applicable.
4. If your occupation type is not College or University Teacher, click “Continue”.
1
2
3
FLAG.DOL.GOV
46
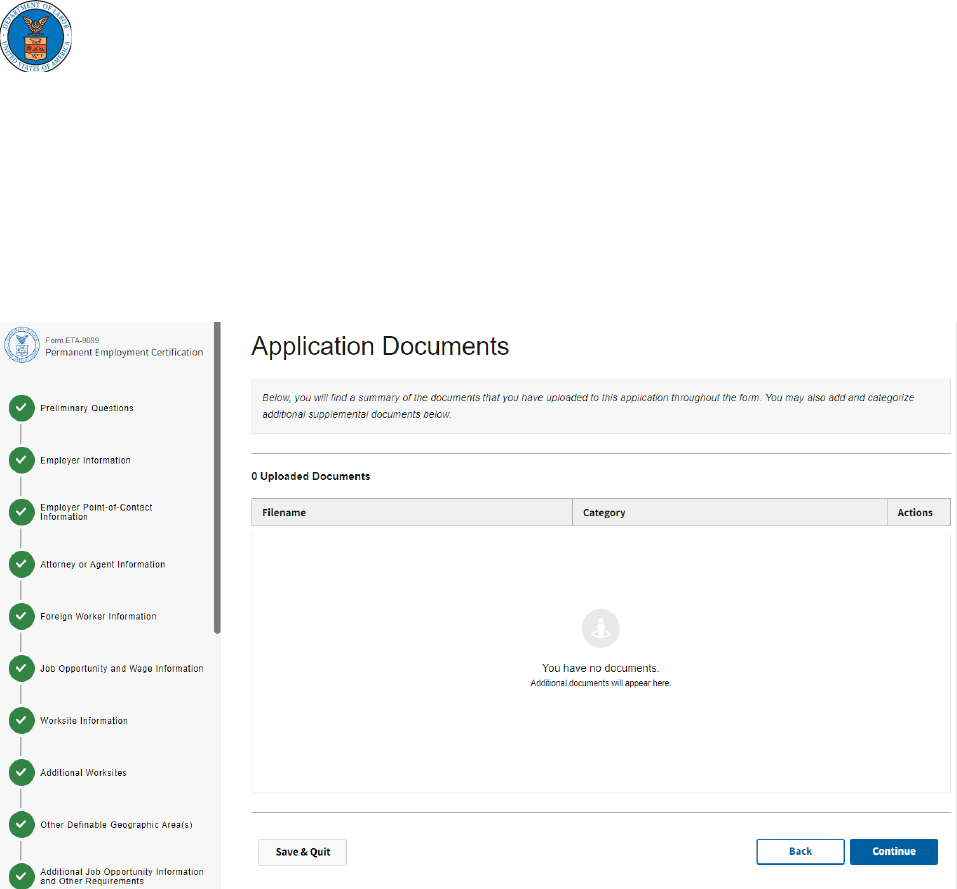
Application Documents
1. This section shows a list of all the documents you have uploaded as part of this application, if
needed.
2. If you want to replace a document, navigate to the section in which the document was uploaded
to clear the upload. Click “Continue”.

FLAG.DOL.GOV
47
Review and Submit
1. This is the final step before submission. You will see a list of the incomplete fields and any
errors that must be corrected prior to submission. Please complete these required fields.
2. The submit button will be grayed out, preventing you from submitting the application with
incomplete or missing information.
3. If you have no incomplete fields or errors, you will get a list of all the blank fields that will be
populated with N/A or 0, as applicable.
4. You can choose to review each of the sections of your application at this time. Use the drop-
down box to select a section of the form to review. Select "Print Summary" to print the
application you have selected.

FLAG.DOL.GOV
48
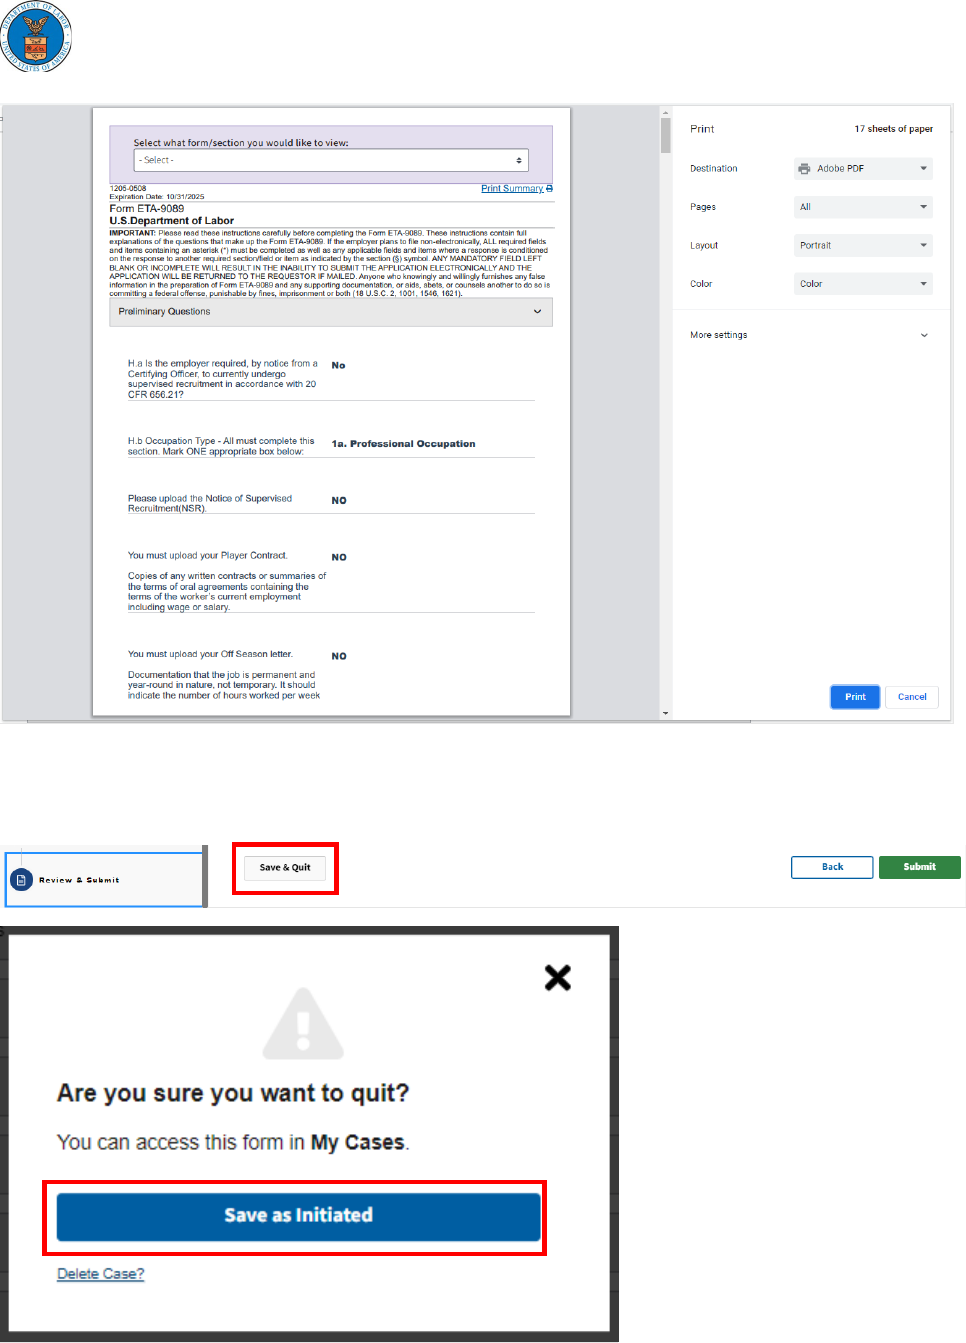
5. If you don’t select a specific form/section, and you click on “Print Summary”, you will receive a
print summary of your entire application.
FLAG.DOL.GOV
49
6. The initiated application can be saved for future submission by selecting the “Save & Quit
button. Click on “Save as Initiated” in the pop-up menu. If you do not want to save the
application, select “Delete Case?”.

FLAG.DOL.GOV
50
7. Once you have saved the initiated application, it will be available in the Cases tab.

FLAG.DOL.GOV
51
8. Click on Cases and select “9089”, and then “Initiated”, your case will now be listed with an
Application ID and a Case Status of Initiated. Click on the Application ID to open the initiated
application and continue completing the application.

FLAG.DOL.GOV
52
Form Submission
1. When you have completed all the required fields for all the sections, and you have all green
checkmarks, your Submit button is green.
2. Click the green Submit button.

FLAG.DOL.GOV
53
3. You will then get a confirmation message (as shown below) indicating your application was
received and submitted for processing. You will also receive a courtesy email notification from
.
Note: add [email protected]v to your address book to avoid emails going into your spam folder.
4. Click “Return to Dashboard” to go back to the main FLAG page.

FLAG.DOL.GOV
54
5. Click Cases Icon on the left, select “9089”, and then “Assigned Case Number”. Your case will now
be listed with its Assigned Case Number.
6. Click on the Case Number. A page will open with information about the case, links to your
documents, and a link to view a PDF of the submitted application.

FLAG.DOL.GOV
55
Withdraw Submitted Application
1. To withdraw your application, find your assigned case.
2. Click on Actions in the upper right-hand corner. You will see option to Withdraw this
application.

FLAG.DOL.GOV
56
3. Select a Withdraw Reason and click Submit.
4. You will get a confirmation that the withdrawal was successfully submitted.

FLAG.DOL.GOV
57
5. If you then go Back to Cases, in the Historical section, the withdrawn case will now be shown
with a Case Status of Withdrawn. You will also receive a courtesy email notification that your
application has been withdrawn.
Note: Once you withdraw an application, it cannot be reinstated for further processing.

FLAG.DOL.GOV
58
Addendum A
How to link a Prevailing Wage Determination (PWD) that is not in your FLAG account to
your ETA-9089 application
1. To link a PWD that is not in your Flag account, select “PWD Case Lookup”. In the Form ETA 9141
Case Lookup, click on “Look up PWD Out-of-Network”.

FLAG.DOL.GOV
59
2. In the Form ETA 9141 Case Lookup (Out-of-Network) screen, enter the full case number,
including dashes, of the PWD in the Search box.
3. Select the PWD that comes up in the table and click “Continue”.
4. Click “Acknowledge & Finish” on the pop-up window that comes up.

FLAG.DOL.GOV
60
Addendum B
How to navigate and use the Cases tab and Notification Center.
Introduction to Cases
1. On the FLAG homepage, you will find a menu on the left-hand side of the screen. Here we will
provide an overview of the Cases tab.
2. Click on “Cases”.
3. Here you can view all cases within your network.
Important Note: The system will update your Cases Table approximately every 15 minutes with the
latest information on your cases. Once the system updates and you refresh, navigate to or return to this
page during your session, you will see changes to your case information.
FLAG.DOL.GOV
61
4. Some key features to take note of:
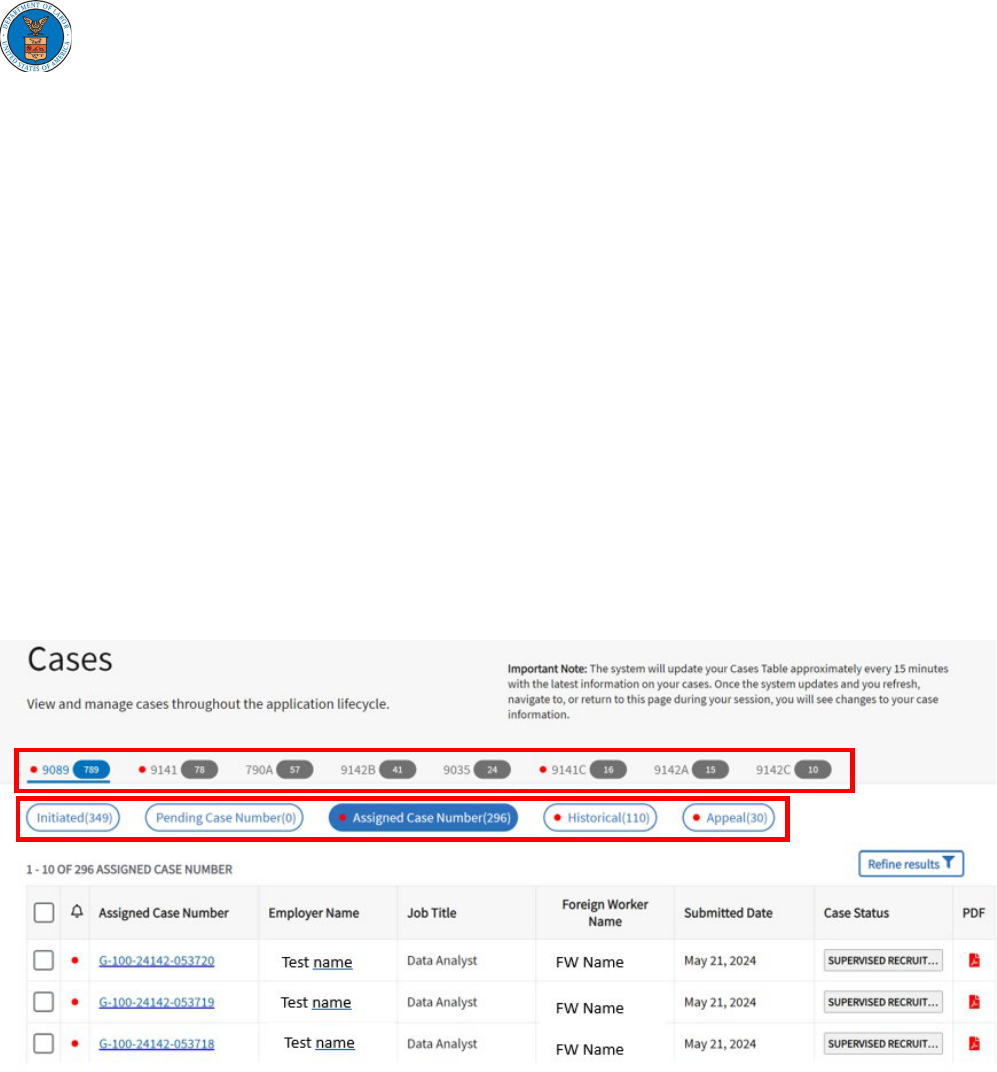
a. Application type. Here you can select the type of application you wish to see by clicking on the
label. Below, the 9089 is selected and underlined with the number of applications highlighted in
blue.
b. Here you will find the top-level application categories. In the screenshot below, “Assigned Case
Number (296)” is highlighted with 296 indicating the number of applications in this category.
i. Initiated. This category will have all applications that have started and saved in
their draft status. These cases have not yet been submitted.
ii. Pending Case Number. This category will have all your submitted cases that
have yet to return an assigned case number. Cases will be in this category for
only a short time.
iii. Assigned Case Number. This category will show all your cases that are in
processing status, not including appeals. Examples include “Analyst Review”,
“RFI Issued”, and “Audit Review”.
iv. Historical. This category will contain all your historical cases. Examples include,
“Certified”, “Denied”, “Denied – BALCA AFFIRMED” and “Withdrawn”.
v. Appeal. This category will contain any appeal processing statuses. Examples
include, “Reconsideration Appeals”, “BALCA Appeals” and “NOAD Issued”.
5. Here you will find a list of column headers to help identify your cases.
Please note:
• The checkbox will select all visible rows.
• The Assigned Case Number shows the unique case number for your application. Click on this
case number to open the case.
• PDF will open the application in a PDF format.
1
2

FLAG.DOL.GOV
62
6. All column headers not including the checkbox and PDF, can be sorted by clicking on the column
header. The below screenshot is an example of clicking Submitted Date sorted from oldest to
newest with an arrow pointing down. Click again for an arrow to point up (Newest to Oldest or
A to Z). Click again to remove sorting.
3

FLAG.DOL.GOV
63
Introduction to Cases
1. As a master member of your network, you can assign and clear case assignments by selecting
the check box next to your application. Master members of networks can see all cases. Sub-
account members can only see cases assigned to them. See the My Network tab on the left
navigation panel for more information.
2. Select any row or multiple rows by clicking on the checkbox.
3. Once selected, you will see a new menu appear above the case columns. In the screenshot
below you can see that two cases have been selected. You can click “Clear”. This will clear the
selections in the checkboxes. Click “Reassign” to open the next assignment window.
4. You may either select from the full list of users in your network or as shown in the screenshot
below, begin to type in the name of the user to limit your view. In the example below “Tammi”
brought up “Tammi Smith”
5. Select the radio button next to your assignee.
6. Click “Continue” to confirm your selection.
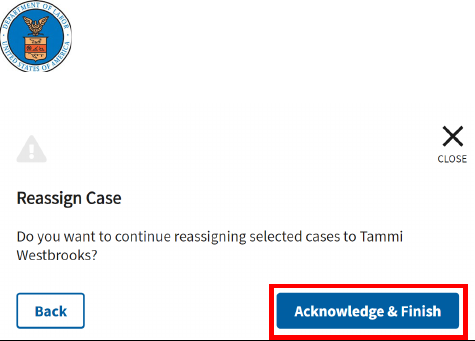
7. You will receive a pop-up to “Acknowledge & Finish” your selection. Click on “Acknowledge &
Finish” to complete the change.
2
3
4
5
6
FLAG.DOL.GOV
64

FLAG.DOL.GOV
65
Search for Cases
If you have many cases, you may wish to perform some advanced filtering with the Refine Results
option.
1. To start, click on “Refine results” found at the top right corner of the case grid.
2. You can filter by:
a. Text: Case number, Employer Name, Foreign Worker Name, or Job Title.
b. Case Owner: Select the case owner with the checkboxes or click show more if your number of
case owners exceeds the screen space available.
c. Status. Click the check box by the case status you wish to filter by.
Please note: Available case status is limited to those in your application category selected.

FLAG.DOL.GOV
66
a
b
c

FLAG.DOL.GOV
67
3. Other options for filtering include.
a. Submission Start Date and/or Submission End Date fields can be selected. By clicking in the date
field, a date picker will display allowing you to select a date.
b. By clicking the checkbox under Notifications, the filter will only show the red notification items
in your case list (see Notification Center
for more details).
c. Determination Start Date and/or Determination End Date fields can be selected. By clicking in
the date field, a date picker will display allowing you to select a date.
d. Click “Clear Filter” to remove your selections or “Apply” to apply your selected filters.
a
b
c
d

FLAG.DOL.GOV
68
Introduction to Notification Center
1. The Notification Center provides a quick and easy way to find new Active Case Actions.
2. These case actions can be found in the Cases dashboard indicated with red dots as seen in the
screenshot below.
3. To open the Notification Center, click on the Bell icon on the top right-hand side of your screen
as indicated below (1).
4. In the Notification Center, you can view both Active and Archived notifications (2).
5. The Notification Column will display the type of notification (3).
1
2
3

FLAG.DOL.GOV
69
6. All new notifications will be available in Active until they are Archived.
7. To move a notification from Active to Archive, select the notification with the selection box on
the left side of the notification as seen below.
8. Then click on the Archive Selected (#) button, this will remove the notification from Active and
move it to Archive.
Please note that once a notification has been archived, no further actions can be taken on the
notification.

FLAG.DOL.GOV
70
Addendum C
How to use the Actions menu.
1. Depending on your case status, the Actions pulldown menu will provide different options. You
can find the Actions menu by opening your case from your Cases menu.
Withdraw
1. In the Actions dropdown menu select the Withdraw option.
2. A pop-up box will display, requesting the Withdraw Reason.
3. Use the drop-down menu to make your selection and click Submit.

FLAG.DOL.GOV
71
4. You will receive the following confirmation message. Click Close.

FLAG.DOL.GOV
72
Request for Information (RFI)
1. Your case may receive a Request for Information (RFI). You will be notified of the request via
the email address entered on the application, as well as a new prompt in the
Notification
Center. To respond to an RFI, you will find new options in the Action drop-down menu.
2. By selecting “RFI Response”, you will be prompted with a pop-up window.

FLAG.DOL.GOV
73
3. In the RFI Response window, under the Document Upload* section you may either:
a. Drag a file from your operating system files directly here and “drop” them or,
b. Click “browse” and use your operating system windows to navigate and select the
appropriate file.
Please note: File types must be .pdf, .doc, .docx, .txt or .xlsx. Additionally, the file sizes must be
30MB or less in size.
4. You may perform this action multiple times to upload multiple documents. In the screenshot
below, you can see there are two uploads, “PERM Mod test upload.xlsx” and “PERM Mod test
upload version 2.xlsx”. To remove these files before clicking submit, click on the “Clear” link next
to the file you wish to remove.
5. Under “Document Description*” enter any document description you wish to. This is a free text
field.
6. Once your RFI is ready, click “submit”. You will receive a confirmation that your case action was
successfully submitted.

FLAG.DOL.GOV
74
Request Extension
1. By selecting “Request Extension”, you will be prompted with a pop-up window.
2. In the Request Extension window, under the Document Upload* section you may either:
1. Drag a file from your operating system files directly here and “drop” them or,
2. Click “browse” and use your operating system windows to navigate and select the appropriate
file.
Please note: File types must be .pdf, .doc, .docx, .txt or .xlsx. Additionally, the file sizes must be 30MB or
less in size.

FLAG.DOL.GOV
75
3. You may perform this action multiple times to upload multiple documents. In the screenshot
below you can see there are two uploads, “Extension request.docx” and “Extension request 2 –
schedule.docx”. To remove these files before clicking submit, click on the “Clear” link next to the
file you wish to remove.
4. Under “Document Description*” enter any document description you wish to. This is a free text
field.
5. Once your extension request is ready, click “Submit”. You will receive a confirmation that your
case action was submitted successfully.

FLAG.DOL.GOV
76
Audit Actions
1. Cases in audit status are in the “Assigned Case Number” tab.
2. When a case is selected for Audit, the case will have the following options available: Withdraw,
Audit Response and Request Extension.
Please see Withdraw and Request Extension
sections for further instructions.

FLAG.DOL.GOV
77
Audit Response
1. To reply to an Audit Response, select Actions and then Audit Response from the drop-down
menu.
2. In the Audit Response window, under the Document Upload* section you may either:
a. Drag a file from your operating system files directly here and “drop” them or,
b. Click “browse” and use your operating system windows to navigate and select the appropriate
file.
Please note: File types must be .pdf, .doc, .docx, .txt or .xlsx. Additionally, the file sizes must be 30MB or
less in size.

FLAG.DOL.GOV
78
3. You can upload one document per action. However, you may perform this action multiple times
to upload multiple documents. To remove a file before clicking submit, click on the “Clear” link
next to the file you wish to remove.
4. Under “Document Description*” enter any document description you wish to. This is a free text
field.
5. Once your audit response is ready, click “Submit”. You will receive a confirmation that your case
action was submitted successfully.

FLAG.DOL.GOV
79
Audit – Request for Information
1. When a Request For Information (RFI) is issued for an Audit, the following actions will become
available; Withdraw, RFI Response and Request Extension
.
Please see Withdraw, RFI Response and Request Extension
sections for instructions on these actions.

FLAG.DOL.GOV
80
Request for Reconsideration
1. To submit a Request for Reconsideration you will need to access a denied case under the
“Historical” tab.
2. When you open a denied case from the Historical tab, any eligible cases for Reconsideration will
have this option available in the Action pull-down menu as seen below.
3. Select “Request for Reconsideration” from the drop-down menu to open the pop-up menu.
4. In the Request for Reconsideration window, under the Document Upload* section you may
either:
a. Drag a file from your operating system files directly here and “drop” them or,
b. Click “browse” and use your operating system windows to navigate and select the
appropriate file.

FLAG.DOL.GOV
81
Please note: File types must be .pdf, .doc, .docx, .txt or .xlsx. Additionally, the file sizes must be 30MB or
less in size.
5. You may perform this action multiple times to upload multiple documents. To remove these
files before clicking submit, click on the “Clear” link next to the file you wish to remove.
6. Under “Document Description*” enter any document description you wish to. This is a free text
field.
7. Once your request for reconsideration is ready, click “Submit”. You will receive a confirmation
that your case action was submitted successfully.

FLAG.DOL.GOV
82
Request for Review
1. To submit a Request for Review you will need to access a denied case under the “Historical” tab.
2. When you open a denied case from the Historical tab, any eligible cases for Review will have this
option available in the Action pull-down menu as seen below.
3. Select “Request for Review” from the drop-down menu to open the pop-up menu.
4. In the Request for Review window, under the Document Upload* section you may either:
a. Drag a file from your operating system files directly here and “drop” them or,
b. Click “browse” and use your operating system windows to navigate and select the appropriate
file.

FLAG.DOL.GOV
83
Please note: File types must be .pdf, .doc, .docx, .txt or .xlsx. Additionally, the file sizes must be 30MB or
less in size.
5. You may perform this action multiple times to upload multiple documents. To remove these
files before clicking submit, click on the “Clear” link next to the file you wish to remove.
6. Under “Document Description*” enter any document description you wish to. This is a free text
field.
7. Once your request for review is ready, click “Submit”. You will receive a confirmation that your
case action was submitted successfully.

